
What is Microsoft PowerApps?
An introduction to Microsoft PowerApps
As all know, that Microsoft InfoPath Services has been deprecated in SharePoint 2019 and their mainstream support ending on July 13th, 2021, and extended support ending on July 14th, 2026. Microsoft has introduced a new concept for its replacement i.e. PowerApps.
PowerApps is a development platform with no-code for mobile, tablets and web apps. It allows “citizen developers” to reach capabilities that were once only reserved for high-end development tools. It is generally quite easy to learn. PowerApps combines visual drag-and-drop concepts from PowerPoint with Excel-like expressions for logic and working with data. You can use it to swiftly take charge of your destiny as long as you make the correct decisions when it comes to structuring.
Types of PowerApps:
PowerApps can create three types of application
- Canvas apps start with your user experience, crafting a highly tailored interface with the power of a blank canvas and connecting it to your choice of 200 data sources. You can build canvas apps for web, mobile, and tablet applications.
- Model-driven apps start with your data model – building up from the shape of your core business data and processes in the Common Data Service to model forms, views, and other components. Model-driven apps automatically generate great UI that is responsive across devices.
- Portals start to create external-facing websites that allow users outside your organization to sign in with a wide variety of identities, create and view data in the Common Data Service, or even browse content anonymously.
PowerApps Environment
There are four tools or environments that you can work within PowerApps, and they each have their own capabilities and roles.

When you finish the app and save it to the cloud, share it with others in your organization. Specify which users or groups can run the app and whether they can also customize and share it with additional people in the organization.
How to Build an App with Microsoft PowerApps
As there are three types of applications for creating apps from PowerApps, but in this blog we will move forward with the canvas app which looks to an alternative of the InfoPath forms.
We will show the steps to build an app in this blog with PowerApps Studio. The simplest way to build a PowerApps app is to start from the data source. Also, in this, we will use the data from the Microsoft SharePoint list. But you can use other sources of data in the PowerApps like Excel, Azure SQL database, common data service etc.
- Sign in to PowerApps.
- Connect to a SharePoint site, type or paste the URL (include only the site URL and not the name of the list) for your SharePoint Online site, and then select Go.
- Under Choose a list, select your SharePoint custom list, and then select Connect.
- Next, we’ll select the “Create an app” option in the PowerApps menu.
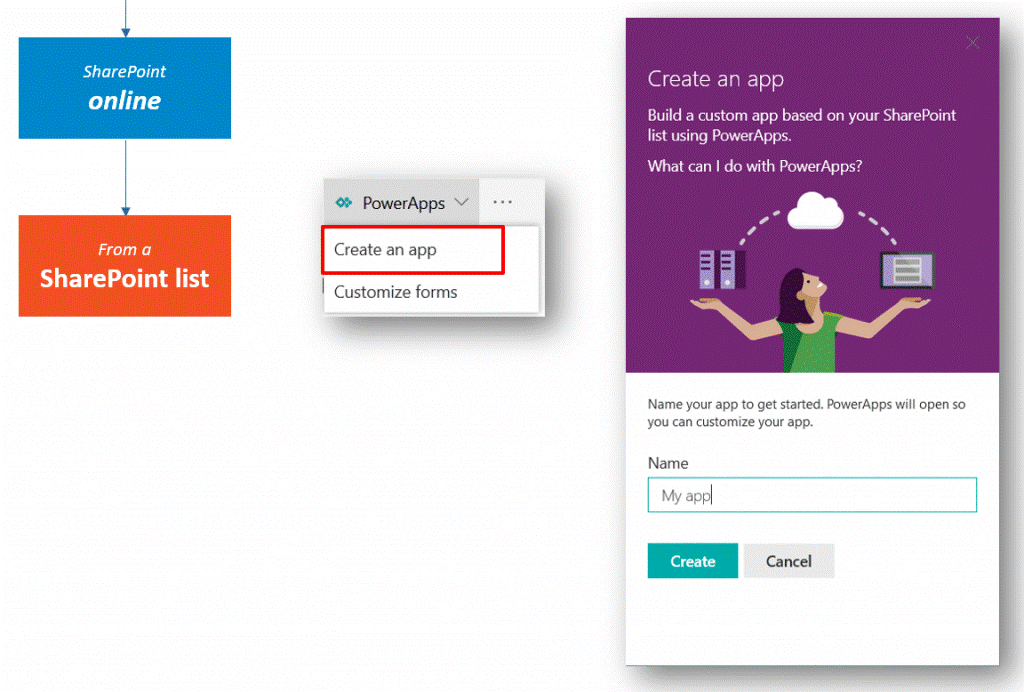
This takes us to the PowerApps Studio where we’ll find a fully functional canvas app generated by the system:

Keep in mind that these are just the default choices. They hide a much wider set of available options, configurations, and architectural choices that PowerApps provides.
You’ll probably want to make more changes before you use this app or share it with others. As a best practice, save your work so far by pressing Ctrl-S before you proceed. Give your app a name, and then select Save.
Author – Rashi Chauhan