Introduction
Continuous Integration and Continuous Delivery (CICD) is the top contender in an age filled with automation and DevOps tooling. With CICD, you are not only able to automate the shipment of software but to do it reliably and efficiently without compromising quality. By ensuring that the end-user experience is continuous, you can provide continuous value to your customers.
In this blog post, you will learn about how to build production-ready releases for code when working with a CICD platform. This tutorial will show you how to create a dev pipeline in Azure DevOps using a real-world example. Since the pipeline is for development purposes, you will learn how to create one stage for development. A build pipeline is set up after the stage is created so that the code can be packaged and made into an artifact. You will have a ready-to-deploy app for a release pipeline after the code is turned into an artifact.
What is Azure DevOps?
Azure DevOps is a comprehensive package that covers the entire application development life cycle, or SDLC. Let’s look at a few significant features of Azure DevOps:
Azure Boards: PowerBI visualization, work item tracking, and other reporting tools are available with Azure Boards.
Azure Pipelines: With Azure Pipelines, you can set up Continuous Integration and Continuous Deployment processes using containers and Kubernetes.
Azure Repos: The Azure Repos service supports private repositories hosted on the cloud.
Azure Artifacts: Package management support for Maven, npm, NuGet, and Python packages from private or public sources with Azure Artifacts.
Azure Test Plans: Supports planning and evaluating testing solutions through integrated planning.
Microsoft’s Azure DevOps is a mature model that provides businesses with the ability to handle multiple tasks simultaneously.
What is the Azure Pipeline?
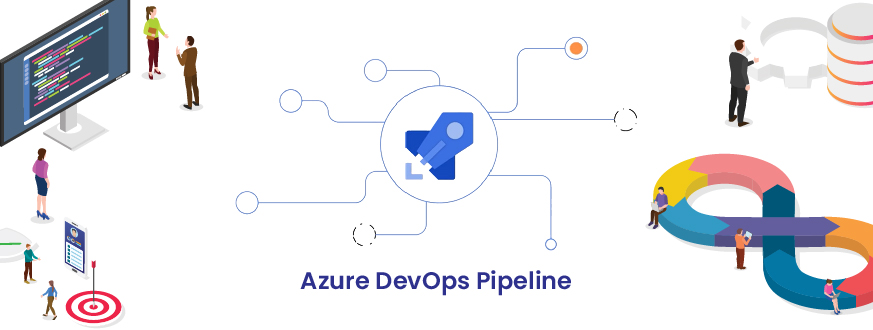
Azure Pipeline is a set of automated processes for building, compiling, and deploying code on other computation platforms. Similar to open source Jenkins and CodeShip, it is a continuous delivery tool. The only purpose of this pipeline is to ensure that there is no manual intervention; all changes are automatically implemented in the project. Automating the process allows this task to be done seamlessly once it has been configured, but when humans handle the process, human error is possible.
Pipelines are normally divided into the following categories:
- Source Control
- Build Tools
- Package creation
- Configuration management
- Monitoring
CI/CD pipelines consistently test, build, and deploy software based on the strong foundations of CI/CD. These also perform constant deliveries automatically by continuous testing and deploying the codes to the targets in the project.
Building the Pipeline
Here, you will take a hands-on approach to create a dev pipeline in Azure DevOps to package code into an artifact ready to be shipped to end-users. The build pipeline can also be referred to as the Continuous Integration Pipeline (CI pipeline) in some organizations. Continuous integration aims to build and test code every time a developer commits changes to version control. With that typically comes building an artifact, which is why you may hear “build pipeline” and “CI pipeline” used interchangeably.
Creating the Pipeline
Before creating the artifact, the initial pipeline needs to be created. As you proceed through this guide section, you will begin creating the pipeline.
- Log into the Azure DevOps portal.
- Go to Pipelines—> Pipelines to access the pipelines pane.
- Within the pipelines pane, click the blue new pipeline
Choosing the GitHub Repository
This allows you to select the code you want to build and turn it into an artifact.
For this example, the Cloud Dev Web Boulter Plate repository was chosen on the Select a repository page, which is the repository linked in the prerequisites section.
Creating the YAML Pipeline
Choose Starter pipeline from the Configure your pipeline section. With the starter pipeline, you can build your own pipeline from scratch to include any tasks you need to build your app.
Review your pipeline YAML and remove lines 13-19 until the code is consistent with the screenshot below. These lines aren’t needed because they’re pseudocode.
Click the Show assistant button to add the two tasks that are needed to establish the build pipeline, as shown in the screenshot below. Two tasks need to be added:
Here are the two tasks you will need to add:
- Copy files– The task copies the code from the linked GitHub repository and stores it in the CICD pipeline to be used for the next task. In Azure DevOps, the target local folder path on the pipeline agent has been predefined.
- Publish build artifacts – This task takes the copied code from the Copy files task and creates an artifact out of the copied code. The path to publishing uses the same predefined variable as in the Copy files task since that’s where the code was copied. The Publish build artifact task needs to look in that location to create an artifact out of the code.
You should see code similar to this if you click on the blue Add button on both tasks.
trigger:
    - master

    pool:
      vmImage: 'ubuntu-latest'

    steps:
    - task: CopyFiles@2
      inputs:
        SourceFolder: 'web'
       Contents: '**'
        TargetFolder: '$(Build.ArtifactStagingDirectory)'
    - task: PublishBuildArtifacts@1
      inputs:
        PathtoPublish: '$(Build.ArtifactStagingDirectory)'
        ArtifactName: 'drop'
        publishLocation: 'Container'
Deploying the Pipeline
Run the build pipeline by clicking the blue Save and Run button.
Azure-pipelines.yml is a file that is created when the YAML pipeline is coded and must be located where the code that is being built and converted to an artifact can exist. The Save and Run page allows you to provide a commit message, or you can leave it blank and just commit directly to master since the existing code is linked in the prerequisites section of GitHub.
Click the blue Job button to see how the code is being built and converted into an artifact.
Congratulations! Your dev pipeline in Azure DevOps has been successfully created and deployed.
Author- Ashish Patel (Project Lead)


Get in Touch